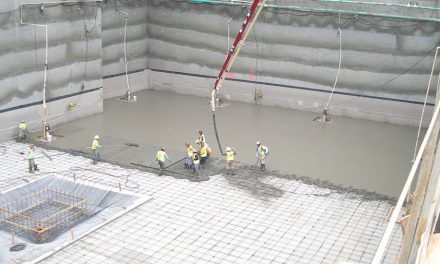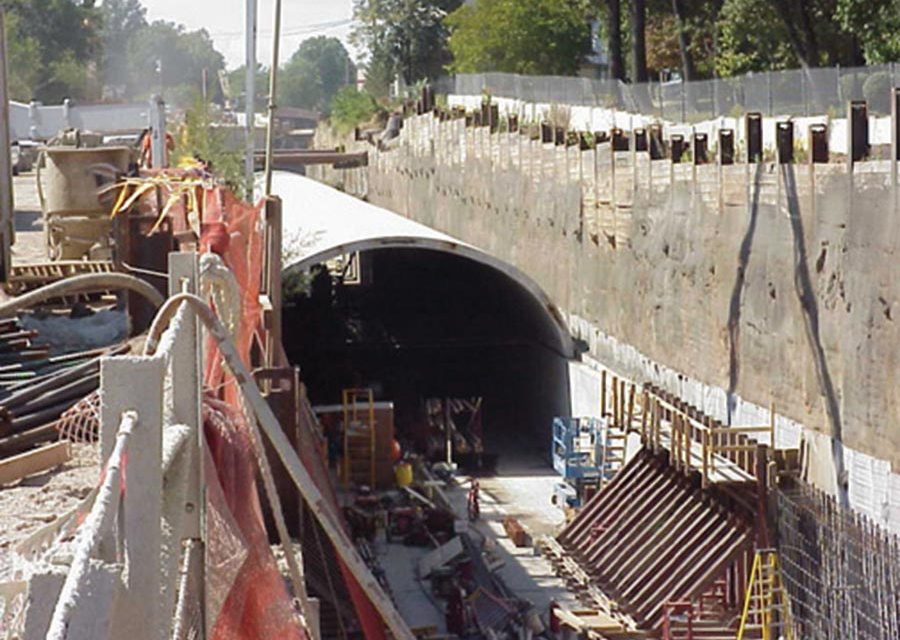
Most tunnels are actually built as trenches using cut-and-cover techniques. This St. Louis subway tunnel was built using the “bottom-up” method, using cast-in-place concrete walls and precast roof segments.
The vast majority of below-grade “tunneling” projects today are actually created using cut-and-cover construction methods. This method—in which a trench is excavated from the surface, then re-covered—is usually more economical and more practical than mined or bored tunneling. It’s especially practical at shallow depths (30 or 40 feet) but depths to 60 feet are not uncommon.
Cut-and-cover tunneling is extremely versatile. Most of the world’s subways have been built using cut-and-cover techniques. It’s the overwhelming method of choice for traffic, rail and pedestrian underpasses, utility tunnels, and a host of other applications.
Construction Methods
Depending on the situation, a variety of different construction methods can be used. Stacy Byrd, National Products Manager at CETCO, says, “There are so many different methods of constructing a tunnel and the waterproofing solution should be designed to fit that particular project and the expected jobsite conditions.”
Byrd continues, “To determine the best waterproofing solution, one must consider how the tunnel will be constructed. Will it be constructed with cast-in-place concrete, precast, shotcrete, or a combination such as a precast tunnel roof placed onto cast-in-place walls? Access is also a defining factor in product selection. Will the waterproofer have the space to install the membrane from the exterior or will it be blindside construction?”
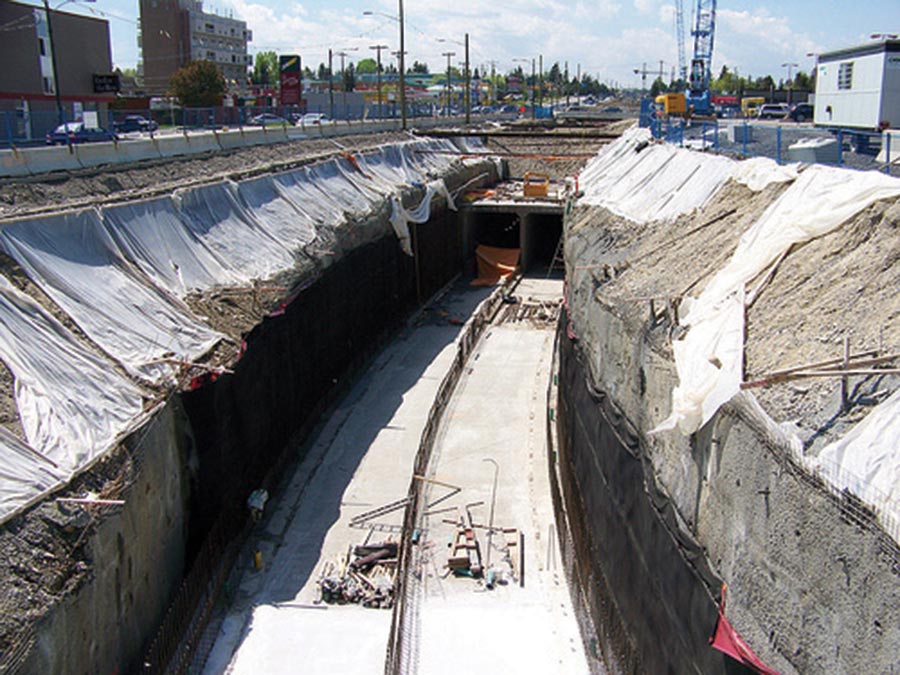
The Calgary light rail tunnels reached 60 feet below grade, and used a combination of soil nails, shotcrete, and cutback slopes that waterproofers had to work around.
Major factors determining the construction method include the excavation depth, soil type, elevation of the water table, site access, and the amount of time which the final “at grade” surface can be disturbed.
In general, the many different construction method used to build cut-and-cover tunnels can be divided into three major categories. Each of them requires an entirely different approach to waterproofing.
Bottom-Up Construction: The most common technique is the “bottom-up” construction. Here, a trench is excavated from the surface downward. Once the final depth is reached, the tunnel floor is built, then the walls and roof are put into place. Finally, the entire structure is buried and the surface restored.
If the construction site has plenty of room, the trench is usually “cut back.” Walls are typically cast in place, and the waterproofing can be applied to the outside face of the concrete with minimal problems.
Usually, though, there’s not enough room for positive side waterproofing. Especially in urban settings, where most cut-and-and cover tunnels are built, land is at a premium, so the excavation is cut vertically and reinforced with soldier piles or soil nails. In these cases, the waterproofing is done “blindside.” With this construction method, the walls (usually shotcrete or using removeable forms on the exposed face) are poured after the waterproofing is finished.
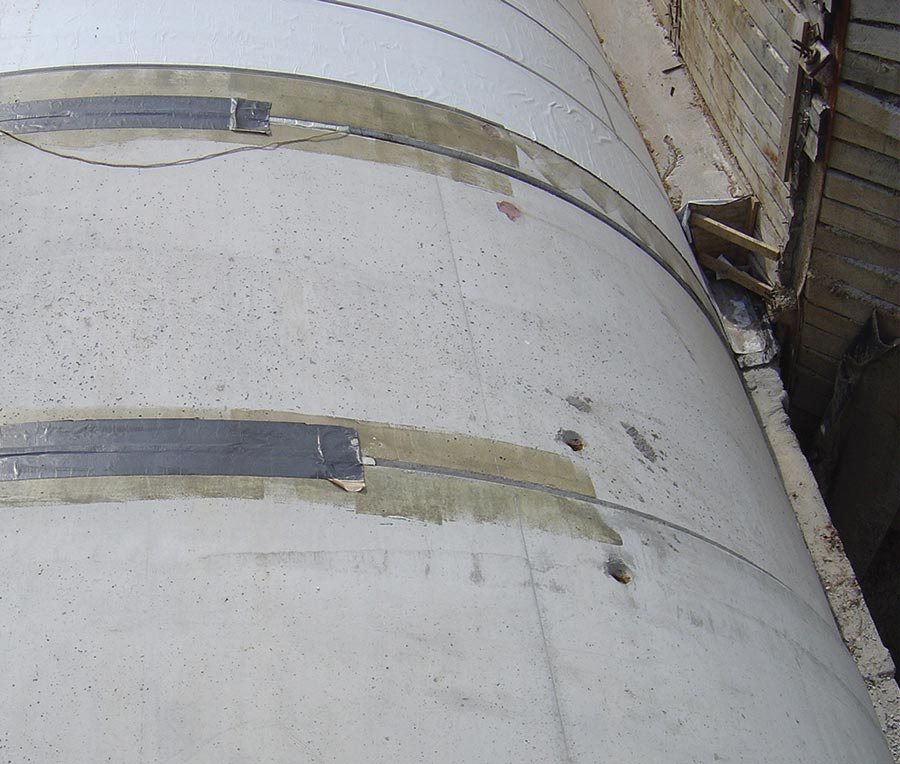
All of the joints in the precast roof segments of the St. Louis subway tunnel at left were detailed and sealed before the waterproofing and drainage layers were installed.
Roofs can be poured in place or formed with precast planks. The roof waterproofing is then tied into the wall waterproofing and drainage, and then the whole system is buried.
Bottom-up construction offers several advantages: First, it’s well understood by contractors, so finding skilled labor isn’t a problem. Additionally, waterproofing and drainage systems can be applied to the outside surface of the structure. The floor of the excavation is easily accessible for equipment and for the delivery, storage and placement of materials.
For these reasons, bottom-up construction is perhaps the most economical method of building large, shallow tunnels, but has the disadvantage of making the site unusable longer than either of the other methods detailed below.
Dave Polk, owner of Epro Services, has been involved with a number of complex tunnel projects, including the Calgary light rail extension.
“Calgary was cut-and cover,” says Polk, at Epro, ‘but it was a little different because portions of it were open-cut.” Polk adds that the deepest areas reach 60 feet below grade, and that parts of the line are a dual tunnel layout.
“We did underslab on everything,” says Polk. “It’s a 60-mil HDPE film, and that underslab system is bath-tubbed up the wall to water table height.” Once the walls were in place, the roof was poured in place in 15-foot sections using slip forms.
The roof experienced a tremendous amount of construction traffic during the backfill process, so the membrane chosen had to be extremely durable.
“We started with a spray-applied liquid membrane, and then laid down a fabric reinforcement,’ says Polk. “Then we spray another membrane over that, which creates a reinforced monolithic membrane that will stand up to site conditions. That was covered with a 15-mil polyolefin film, and then a heavy duty drainage composite, which we tied into the composite on the walls.”
CETCO was involved with waterproofing the recent extension of the below-ground St. Louis light rail, which used bottom-up cut-and-cover construction for the walls and a pre-cast roof.
Byrd explains. “Because it was going through residential sections of the community, they couldn’t overexcavate and had to pour the tunnel walls directly onto the soil retention system. We provided a bentonite-geotextile membrane that was installed to the soil retention wall prior to the concrete placement. The bentonite geotextile membrane was also used as an underslab barrier over the gravel substrate.”
The precast arched concrete segments for the roof were waterproofed using a peel-and-stick butyl rubber membrane that tied into the system used on the walls.
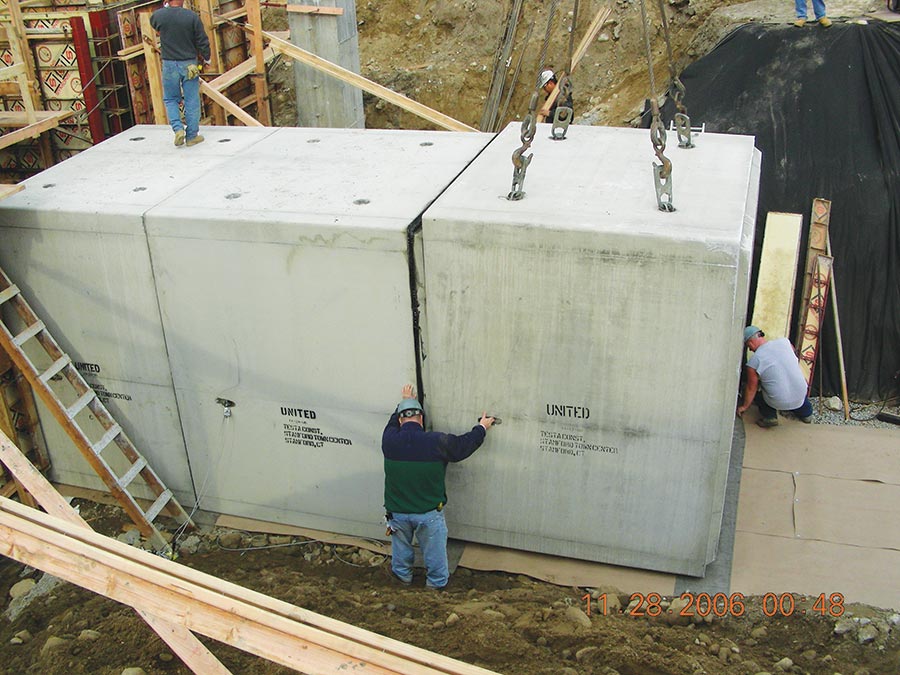
Modular Tunnels: For small tunnels, such as utility or sewer access tunnels and pedestrian underpasses, a variation on bottom-up construction can be used. Called “modular tunnels,” this construction method uses corrugated steel or pre-cast concrete segments to create the structure. These segments are usually waterproofed offsite and craned into place.
One of the primary challenges with waterproofing precast tunnels, then, is ensuring that the membrane is not damaged between when it is applied and when the tunnel segments are set into place. To ensure the waterproofing and drainage components stay in constant contact with the bottom of the precast section, designers often call for a concrete “mud slab” instead of loose gravel at the bottom of the excavation.
Waterproofers must also pay careful attention to the many joints between the pre-cast sections to ensure the tunnel remains dry.
A utility corridor built on the campus of the University of Connecticut in 2006 used this method. Each segment measured ten feet square and eight feet long, and was craned into place onto a four-inch thick mudslab, then waterproofed. First, the joints between each segment were sealed using Ultraseal BT, a product that combines bentonite clay with a hydrophilic polymer. Then, workers covered the roof and walls of the tunnel with Volclay, a similar sheet product that also contains a bentonite-polymer alloy.
Top-down Construction: The top-down construction method calls for the walls and roof of the tunnel to be put into place before the actual excavation takes place. The advantage of this method is that the surface is disturbed for a minimal amount of time—an important consideration if the tunnel is being built under a heavily used traffic artery.
In the top-down method, the first step is getting the temporary walls in place. These could be steel sheet piles or a concrete slurry wall. Once the walls are completed, the roof of the tunnel is constructed and the surface (usually a roadway) is restored.
The surface is then available for normal use while the tunnel excavation is carried out.
Top-down cut-and-cover tunnels use blind-side waterproofing techniques. The waterproofing membrane is typically applied between the temporary shoring wall and the permanent tunnel lining. The tunnel floor slab and the underslab barrier are typically the last part of construction to be completed.
The underpass tunnel leading to the San Jose Airport was built using this method. Site conditions were difficult, to say the least; the water table was only six feet below grade, which meant even the top of the tunnel would be below the water table.
Polk, at Epro Services, explains how the job went. “The first thing that needed to be done was the installation of construction wells and pumps—a site dewatering system,” says Polk. “They built the top of the tunnel first. They drove pilings in, then poured corbels and reinforced concrete beams on that. Once that was is place, we could waterproof the top.” By finishing the top first, surface roads could be opened sooner and minimize the traffic disturbance.
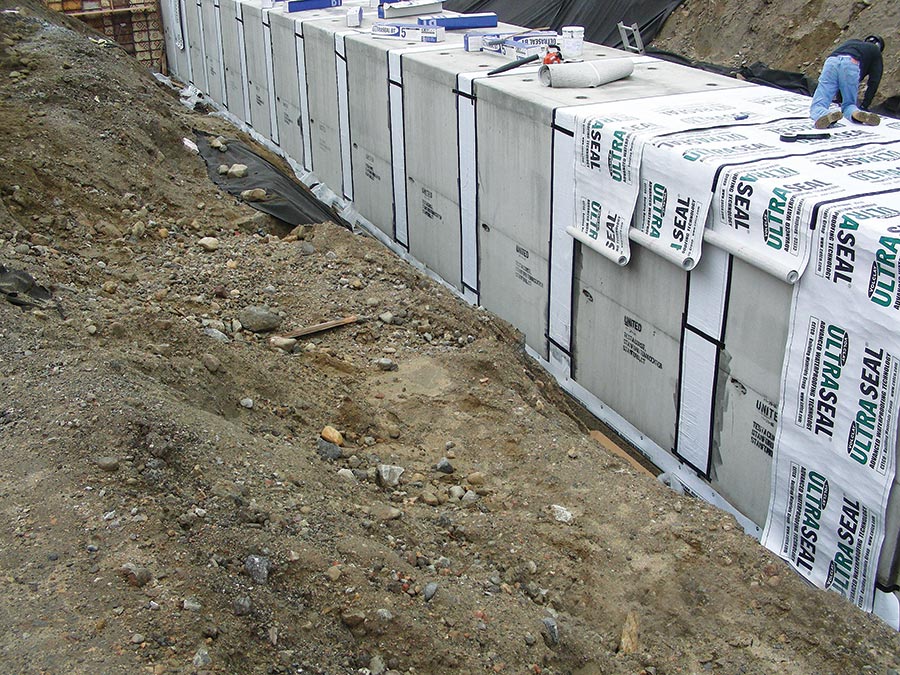
This college utility tunnel used modular precast sections. It was waterproofed using a bentonite-polymer alloy after the segments were placed in their final location.
“We used our spray membrane with a HDPE [high-density polyethylene] film over the top,” says Polk. “We knew it would be covered by paving, so we just used strip drains for drainage.”
Then they began excavating under the roof, installing post-tensioned tiebacks as the work progressed to keep the pilings stable. The tunnel bottom had to withstand 20 feet or more of hydrostatic pressure, so the waterproofing system here was absolutely critical. They used a seamless, spray-applied membrane sandwiched between two layers of HDPE.
The wall waterproofing was done blindside. Polk’s crew first applied a dimple drain sheet, then carefully sealed around the tiebacks and other penetrations. They tied this into the top and bottom waterproofing systems, then sprayed a final layer of waterproofing on the walls. Then it was enclosed in shotcrete. Completed about ten years ago, it’s still as watertight as the day it was completed.
Waterproofing Considerations
The type of waterproofing used on cut-and-cover tunnel installations usually hinges on the type of soil retention system used on the sides of the excavation. As noted above, “open cut” excavations are the easiest. Soldier piles and sheet piles are more difficult. Soil nails retention systems, which can involve detailing around literally hundreds of different points, are the most involved.
Regardless of the system used, waterproofing is essential. Not only does it reduce corrosion and maintenance and extend the life of the structure, but it can also improve safety. In colder climates, leaking tunnels can create hazardous ceiling icicles or ice patches on roadways.
Additionally, once a tunnel is placed in service, they’re extremely inconvenient to close, which imposes severe constraints on remedial waterproofing options. Particularly with rail tunnels, options for getting to—and repairing—leaking sections become extremely limited.
A few years ago, the U.S. Department of Transportation published a white paper explaining good design of cut-and cover tunnels. It places special emphasis on waterproofing. “The conception of the waterproofing system in cut-and-cover tunnels demands an exact planning of the system, a good collaboration and discussion between producer, designer of the project, main contractor and installer,” it reads. “Too often the importance of waterproofing is underestimated by the designer with the consequence that the execution of the waterproofing works are immensely difficult to achieve.”
Their study indicates that the best results can be achieved by paying special attention to “joint sealing, waterproofing of penetrations, reinforcement opti-mization, and drainage in area of the ceiling/crown.”
Winter 2012 Back Issue
$4.95
Piering for Foundation Repair
Cut-and-Cover Tunnels
A Systems-Based Approach to Waterproofing
AVAILABLE AS DIGITAL DOWNLOAD ONLY
Description
Description
Piering for Foundation Repair
Structural repair work dovetails nicely with many waterproofing businesses. With new piering methods, residential foundation repair is easier—and more profitable—that ever before.
Cut-and-Cover Tunnels
One of the most popular and cost-effective tunnel systems, this technique is popular for building subways, utility corridors, and other shallow tunnels. Here’s how they’re waterproofed.
A Systems-Based Approach to Waterproofing
A successful waterproofing system is more than membranes. It’s a combination of waterproofing, drainage, pumps—even landscaping and rain gutters—that must work together as a system.
Additional Info
Additional information
| Magazine Format | Digital Download Magazine, Print Mailed Magazine |
|---|