Good drainage is much more than membranes. It starts with gutters and downspouts and extends to sprinklers, landscaping, and lot topography.
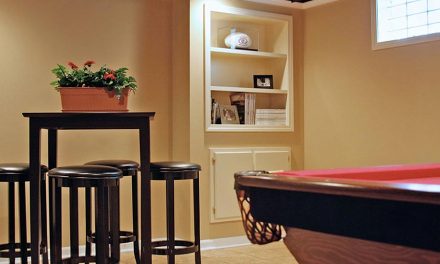
Damp basements aren’t just unpleasant; they can be literally hazardous to your health. On the other hand, a properly waterproofed basement can be a pleasant place for your family to spend time.
Good waterproofing is one part of the solution, but by itself is inadequate. The true key to having a dry, enjoyable living space is proper drainage. This is much more than a simple membrane, but involves the eaves, gutters, and downspouts, and extends to landscaping, sprinklers, and even the slope of the ground around the foundation.
Start at the Top
While groundwater is one obvious cause of wet basements, it’s actually surface water that causes most of the problems. Proper control and drainage of both sources is essential to the success of any waterproofing system.
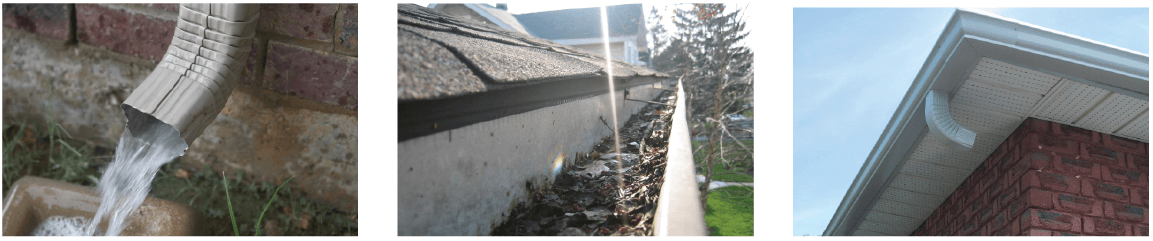
Roofs can channel an enormous amount of rainwater. To ensure that this moisture doesn’t end up right next to the foundation, keep rain gutters in good repair and free from debris. Downspouts should be properly installed.
“Many people are amazed when they learn just how much water can run off their roof,” says Murray Anderson. “One inch of rain falling onto 1,000 sq. ft. of roof translates into more than 600 gallons of water.”
The first line of defense in keeping your basement dry is fastened to the eaves of your house. If rainwater is allowed to just run off the roof, moisture will typically build up around the outside of the foundation and that vapor will make its way through the “solid” walls. Even worse, it can put so much pressure on the foundation that cracks and even major structural damage can appear.
Make sure that rain gutters are clean and free from debris.
Downspouts should guide the water well away from the foundation; six feet is a common minimum recommendation.
Down to Earth
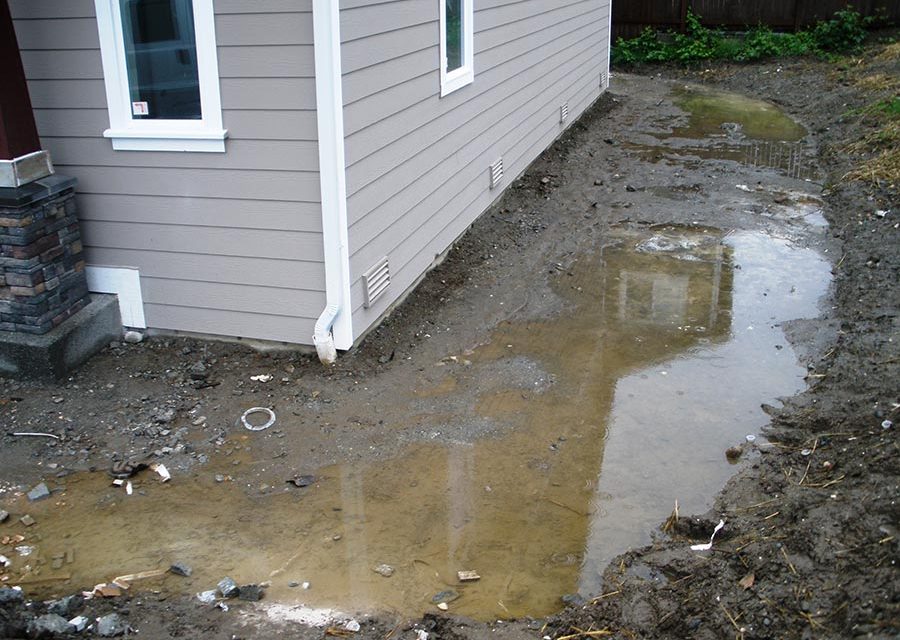
When builders backfill around a new basement, the soil is not as compacted as the unexcavated soil nearby. Over time that soil slowly settles so that it’s not uncommon to find the ground actually sloping towards the foundation rather than away from it.
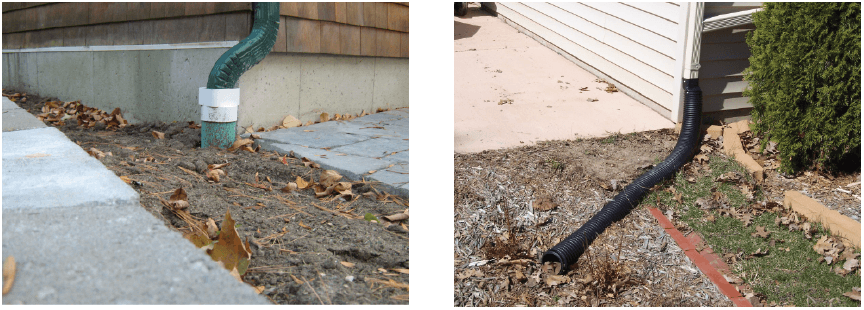
There are numerous options to ensure water from downspouts is discharged at least six feet from the foundation. Flexible pipe (left) is a common solution. Alternately, it can be directed to a French drain below grade (far left) or onto an impervious surface sloped away from the home (bottom left).
That’s one reason to make sure rain gutters are working, and that downspouts discharge the water well away from the house. Make sure the soil adjacent to the foundation slopes away for a distance of at least six feet. It doesn’t have to be much; one to one-and-a-half inches per foot is sufficient to keep rainfall from soaking in close to the walls. Adding extra soil around the foundation to create the proper slope is relatively easy, and can solve many moisture problems.
Flower beds, bushes and shrubs are often planted close to the foundation to shield it from view, but they can cause problems. Be careful not to overwater, and make sure water from sprinklers doesn’t touch the walls.
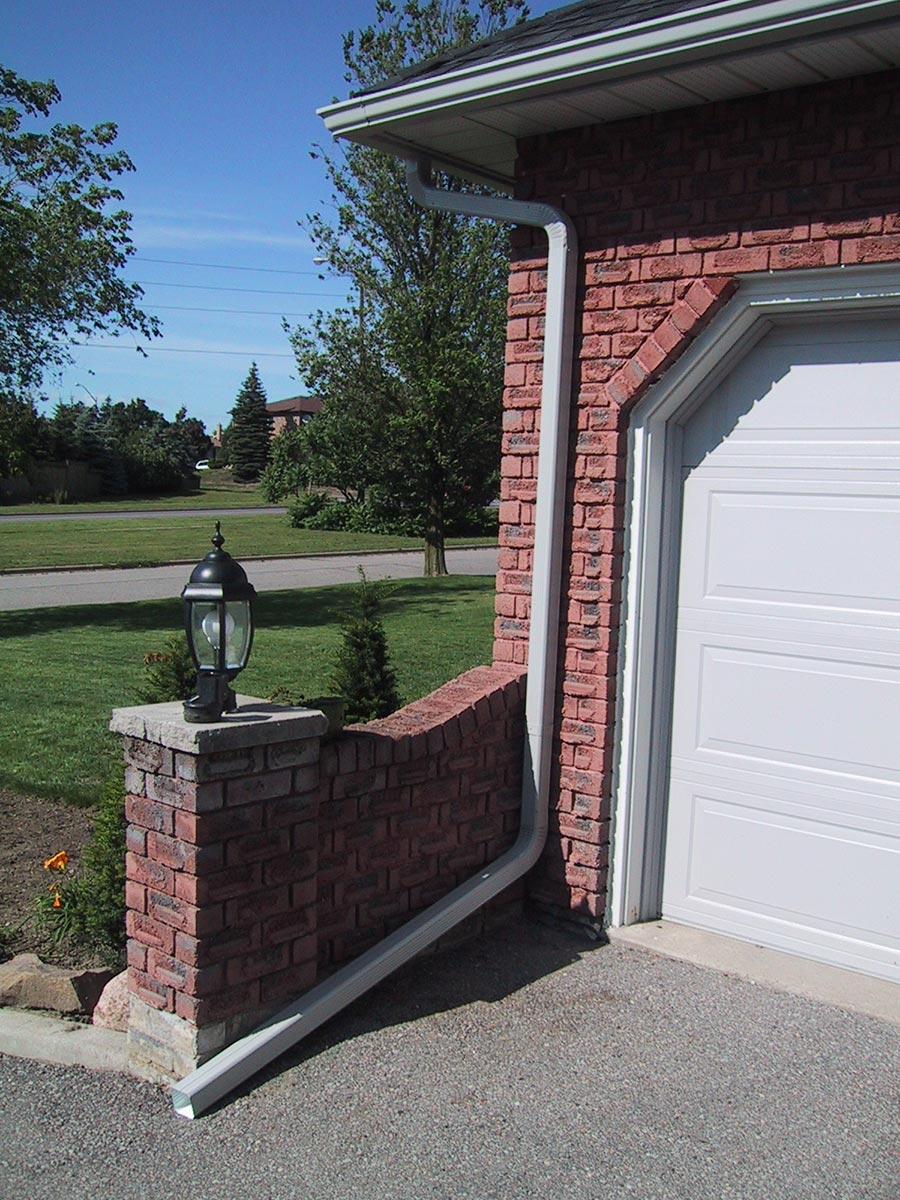
Many landscape designs place walkways and other solid surfaces next to the home to ensure the water doesn’t soak in close to the foundation.
“Surface drainage is the single most important application of foundation waterproofing,” says an expert at mywaterproofing.com. “Unless you have an underground spring or an unusually high water table, the surface drainage portion of your waterproofing system controls the greatest amount of water.”
Concrete Protection
Once the water is in the ground, it is kept from the foundation through a system of drainage membranes and tiles.
The control of groundwater is a little more complicated due to the fact that groundwater levels fluctuate throughout the year. It’s usually at its highest levels in the spring after winter thaws and at their lowest levels in dry summer conditions. Just because the soil is dry during summer construction season doesn’t mean it will
be dry through the wet winter months. The waterproofing and drainage system must be designed to accommodate the highest level of anticipated groundwater, even if this occurs only infrequently.
A proper below-grade waterproofing design must include a system for collecting, draining, and discharging groundwater away from the structure.
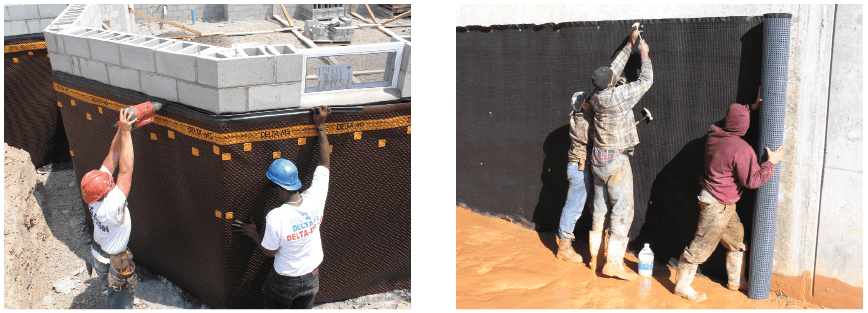
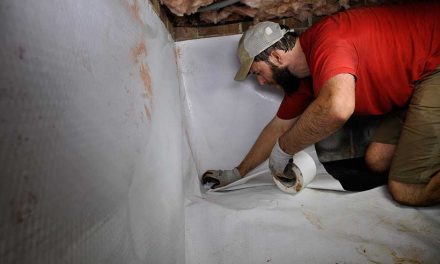
Dimple membranes are a proven below-grade drainage solution. They’re simply unrolled and fastened near the top of the wall using proprietary fasteners. They also protect the foundation from backfill damage.
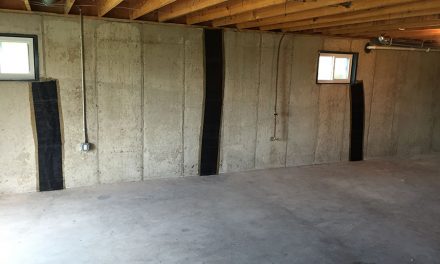
Rigid or semi-rigid insulating drain panels are one option. They’re lightweight, protect the waterproofing membrane during backfilling operations, and insulate the below grade living space. Other panels, like Drain & Dry by Mar-Flex, or Tuff-N-Dri by Tremco are made from fiberglass and resin. Panels are usually available with a geotextile face on one side.
Sheet drains, or dimple membranes, are another popular option. Made by at least half a dozen companies, they’re available in a wide range of sizes, compressive strengths, flow rates, filtration capabilities, and chemical resistance to suit virtually any drainage application.

Examples include Cosella Dörken’s Delta MS, MiraDRAIN by Carlisle Coatings & Waterproofing, Platon by Armtec, and GeoMat by MarFlex. SuperSeal and DMX also produce dimple membranes. Many of these companies also manufacture dimple membranes with a bonded geotextile face for more demanding applications. Examples include American Wick Drain’s Amerdrain, Tremco’s TremDrain, Cosella’s Delta Drain, and similar products from Mar-Flex and Cetco.
Watch Your Footing
Regardless of what type of drainage board you use, a footing drain—sometimes called drain tile—must be installed to move the water away from the structure.
“Ideally, the drain tile should be installed at the top of the footing,” says Steve Gross, director of marketing at CertainTeed. “You want to intercept the water before it gets to the cold joint between the foundation wall and the footing. That’s typically a weak area for water penetration, and it’s where hydrostatic pressure is the greatest.”
Historically, the solution has consisted of a perforated PVC pipe, buried in washed gravel and covered with straw to prevent soil from clogging the system. This system works, and is still used frequently. The biggest disadvantage is that it’s dependent on good workmanship, and over time it may become clogged with dirt.
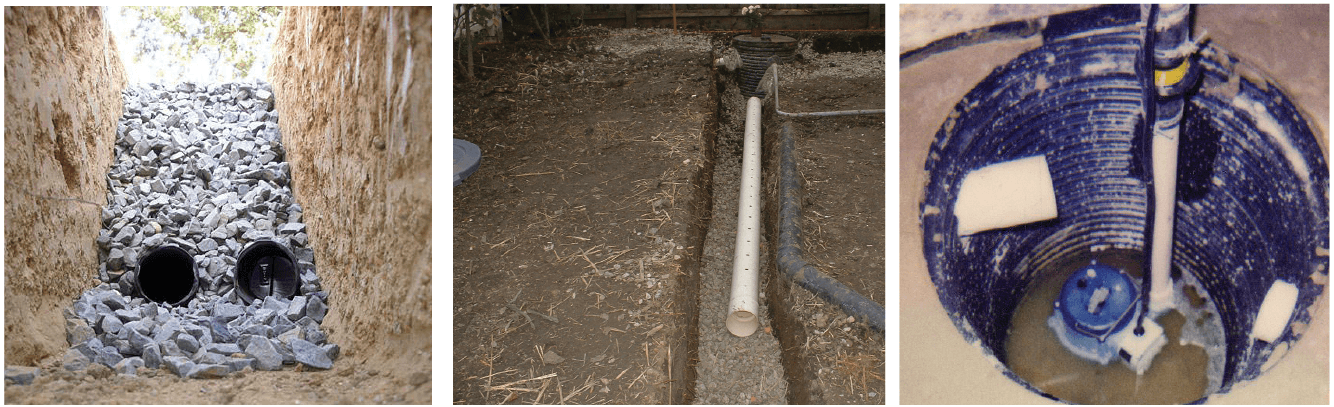
The footing drain should be laid in gravel (left) and taken to either daylight, a dry well (center) or a sump pit (right) where a properly installed sump pump will remove it from the structure.
Over the past 20 years, manu-facturers have developed prefabricated footing drains that resolve these issues. Most of the manufacturers listed above also market drain tile. American Wick Drain and Tremco Barrier Solutions each offer their dimpled sheet drain and drainage tile in single product to make installation easier. CertainTeed’s Form-A-Drain doubles as a footing form during construction.
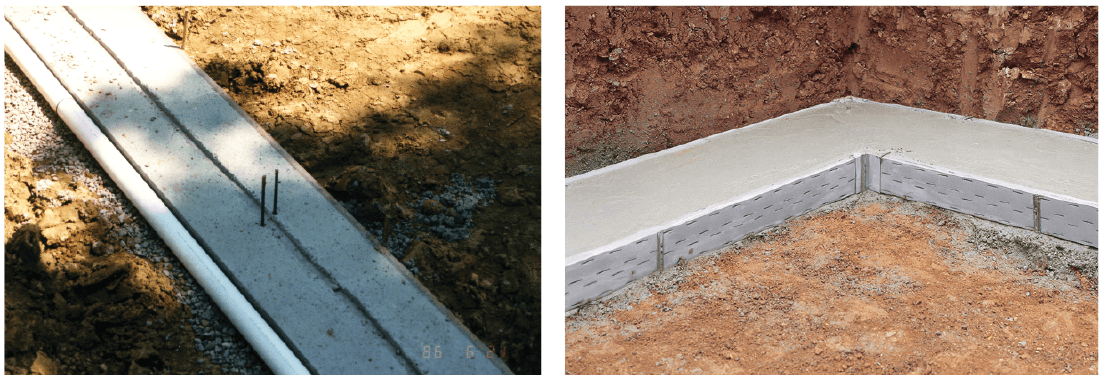
Drain sheets must be combined with footing drains to ensure water is directed away from the basement. Options include flexible perforated pipe wrapped in a geotextile (left), rigid perforated pipe in a bed of gravel, or a unique 2-in-1 footing form and drain tile from CertainTeed.
Disposal
The water collected by footing drains needs to be taken away from the structure. If you’re building on a sloped lot, the footing drains can “run to daylight.” If the lot is flat, you’ll need a sump pump, which moves the water to either to a French drain placed well away from the house or into a storm water drainage system.
A wide variety of sizes and kinds of pumps are available. Some are hard-wired directly into the home’s electrical system. Others offer battery back-up, or audible alarms when the water gets too high. A few can even be programmed to dial your cellphone if something goes wrong.
Winter 2011 Back Issue
$4.95
Negative-Side Waterproofing
Ballasted Roof Basics
Drainage Do’s and Don’ts
AVAILABLE AS DIGITAL DOWNLOAD ONLY
Description
Description
Negative-Side Waterproofing
In some cases, the most effective waterproofing method involves coating the interior side of the wall. Here’s how this technique works, and the products used to make it successful.
Ballasted Roof Basics
When gravel, pavers, or vegetation is used to hold roofing components in place, the result is a ballasted roof. This time-tested technique recently received a new look from code councils, and the results may surprise you.
Drainage Do’s and Don’ts
Below-grade waterproofers know that a successful system is more than membranes. It starts with the eaves, gutters, and downspouts, and extends to landscaping, sprinklers, and ground slope.
Additional Info
Additional information
| Magazine Format | Digital Download Magazine, Print Mailed Magazine |
|---|