By Jay Schmid
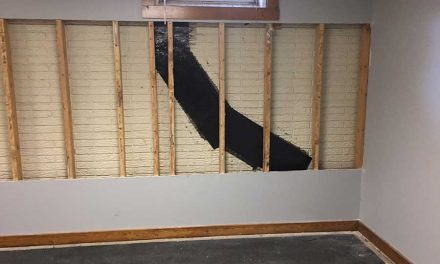
For typical residential applications, crack injection can be accomplished in less than one hour and can be done conveniently from inside the basement.
A casual debate often will arise over the use of either epoxy or polyurethane foam for concrete crack and joint repair. Both will fill the crack and prevent water infiltration, so if simply preventing a leak is the only concern, then either product is fine to use.
The question of which product is better depends on the type of crack or joint and conditions present at the time of the repair. For a majority of standard concrete foundation cracks, the best answer is, “whatever the contractor is most comfortable using.” In residential foundation repair, usually either system will work, so the best choice is the product the contractor is most experienced with. This ensures the product is applied correctly and that the repair goes as smoothly as possible.
The vast majority of cracks in concrete structures are formed due to the shrinkage of concrete during the cure cycle but there is a whole separate class of cracks that often require expert review in terms of resin selection. Cracks due to movement, shifting and/or settling should be evaluated by a structural engineer who can provide professional opinion on the best corrective action.
Epoxy
The obvious difference between the two injection systems is that epoxy will restore the structural integrity of the crack or defect in the concrete by filling the crack with a high-strength adhesive that essentially ‘welds’ the cracked wall back together. Filling the crack or joint with these high-strength epoxies eliminates the movement that would otherwise occur due to temperature swings and wet/dry seasonal cycles.
Epoxies formulated for use in structural and load bearing applications are classified and specified according to the ASTM C-881 specifications of Type, Grade and Class.
Type will designate the type of epoxy for that specific type of repair.
Grade is the viscosity of the epoxy or thickness of the resin as defined:
Grade 1: Low viscosity;
Grade 2: Medium viscosity;
Grade 3: Non-sagging consistency.
Class governs the temperature range in which the epoxy is expected to be installed or used. The Class designations are:
Class A: Below 40 F to manufacturer defined low;
Class B: 40 – 60 F; and
Class C: Above 60 F to manufacturer defined high.
For crack repair, typically a low viscosity injection resin specifically designed for structural crack repairs is used. It would be defined according to ASTM C881 specifications as a Type IV, Grade 1, Class B or C since most repairs are done at 40 degrees or above. (Injecting concrete colder than freezing is not recommended, as there is a risk of frost inside the repair, which could compromise the integrity of the job when the temperature rises above freezing.)
Employing an epoxy resin system that meets or exceeds ASTM C-881 standards will ensure that resin will achieve minimum bond. ASTM standards also ensure that the product will meet the claimed strengths, as these products meet strict and rigorous testing requirements relied on by engineers and the U.S. Dept. of Transportation for their repair projects.
Low viscosity epoxy resins are usually best for thin or hairline cracks (less than two millimeters). That’s because the epoxy will remain liquid during the injection process, and provides the resin the extra time that may be needed to fill tight hairline cracks when using low-pressure, cartridge-type injection systems.
Polyurethane
Polyurethane foam also fills the crack or joint with a resin that expands in the presence of moisture. Unlike epoxy, polyurethane foam is flexible enough to accommodate movement in the crack or joint due to changing soil pressures or minor settlement.
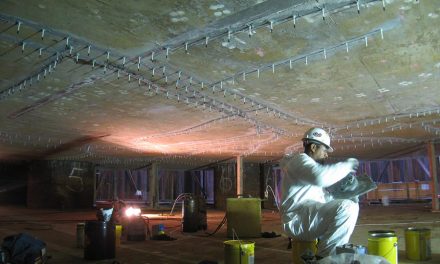
Crack injection is also used for commercial applications. This commercial building in Australia used epoxy injection to restore this tilt-up wall to original strength.
Since polyurethane resin systems expand during the injection, less resin is required to accomplish the repair and can be much more economical to install—especially in wide cracks and loose soil conditions.
Wet or actively leaking cracks and joints often will have better results being injected with polyurethane foam. In fact, because polyurethane resin systems are moisture reactive, they may actually require the crack to be pre-wet with a small amount of water in order to activate the full expansion of the resin.
There are epoxies that will work well in wet conditions as the epoxy will displace the water during the injection process, but extra care needs to be taken to “flush out” any resin that combines with the water. (More on how this is accomplished later.)
For very wide cracks or joints, the polyurethane expanding foam systems will fill the crack and do so with a fraction of the resin that would be required if epoxy was used. When encountering unusual repairs such as cold joint type leaks or honeycombing, expanding polyurethane grouts are the material of choice to be able to attack the hidden unknown of these types of repairs.
Deep subterranean concrete repair in tunnels and municipal systems often involve actively leaking cracks and joints that will require specialized fast-reacting polyurethane grouts that can be employed as “cut-off” grouts to stop high-pressure, high-volume water flow. Most of these polyurethane grouts are mixed with an optional catalyst that allows the reaction time to be adjusted to react more quickly if needed to meet the jobsite conditions which can vary job to job.
Application
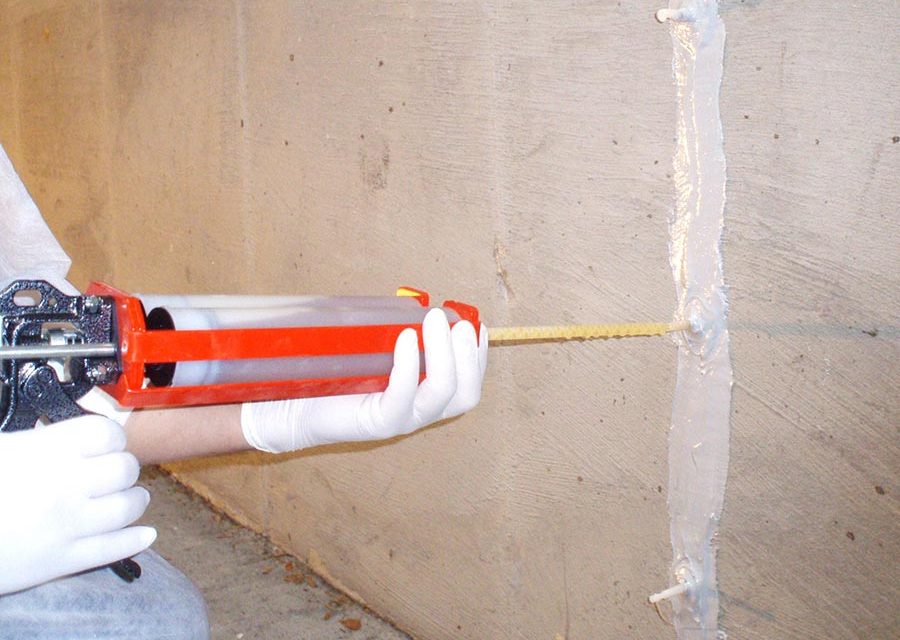
For typical residential applications, either systems can be installed in less than one hour and can be conveniently applied from the inside of the basement. This eliminates the need for digging up the outside of the foundation which can be disruptive, time consuming and costly. Both resin systems are available in single 10-ounce caulking style cartridges or dual side-by-side cartridges and injected with low-pressure hand dispensing tools.
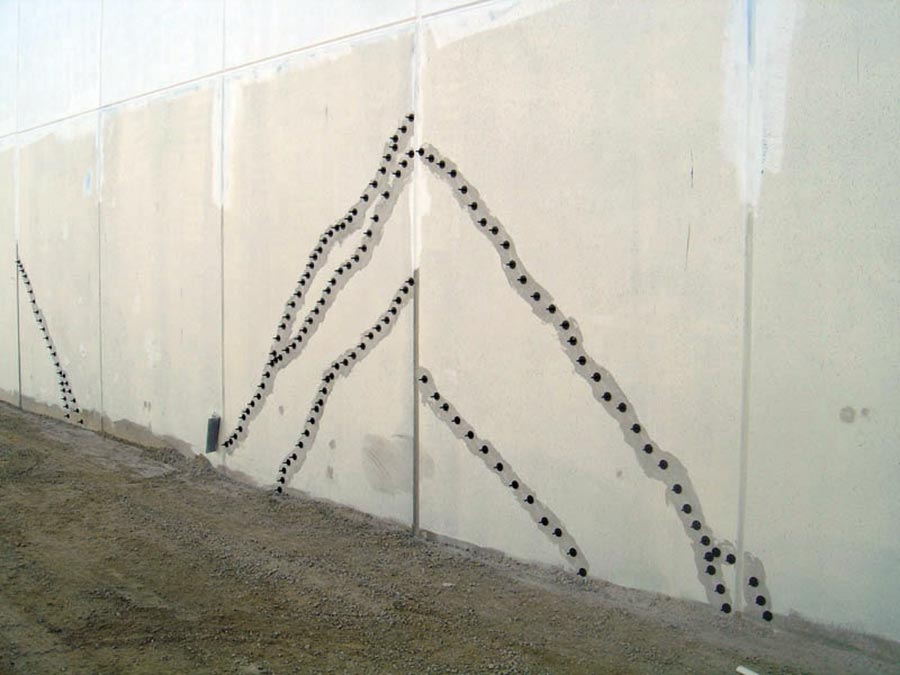
Both systems are installed essentially the same way, using similar tools and techniques. First, surface mounted plastic injector ports are glued over the crack with a fast-setting epoxy paste at 10- or 12-inch intervals. Additional epoxy paste is used to cover the crack between the ports. Once the epoxy surface seal has hardened, the resin of choice is slowly injected into the lowest port utilizing hand pressure equal to a firm handshake.
The resin will flow into the crack filling from the bottom up and then eventually appear at the next higher port. The flow of the injection resin is halted by releasing the pressure on the cartridge. Remove the nozzle from the lower port and cap the port. Move the cartridge up to the next higher port and resume injecting the resin again. Repeat this process until the entire crack is full and resin starts to flow out the top of the crack.
Earlier, I referred to “flushing” water out of a wet crack when using epoxy. This is accomplished by continuing the injection of the epoxy until it comes out the next higher port, continuing to push out any resin that appears milky until clear resin flows out the next port clear and streak-free.
After the injected resin has fully cured, the ports and epoxy surface seal may be removed for cosmetic reasons.
Tips
Be sure to seal up any part of the foundation crack visible above grade on the outside of the building. Allow the surface paste epoxy to harden before starting the injection process. Attempting to inject too soon can cause the surface seal or ports to rupture or “blow-out”. Also applying too much pressure to the cartridge may encourage the tubes to leak.
Injecting urethane resins slowly will allow the resin time to begin reacting with the moisture and maximize the expanding action of the resin.
Always follow the manufacturers’ installation and safety instructions and finally, remember these are chemical adhesives that will stick to most everything—including you!
Mr. Schmid is general manager of Polygem, Inc., which markets epoxy and polyurethane crack injection systems.

Spring 2010 Back Issue
$4.95
Understanding Integral Waterproofing
Options in Grout: Urethanes versus Epoxies
Green Roofs as a Retrofit
AVAILABLE AS DIGITAL DOWNLOAD ONLY
Description
Description
Understanding Integral Waterproofing
Instead of relying on membranes installed after the pour, integral waterproofing uses admixtures to make the concrete itself impenetrable to moisture. Some will self-heal minor cracking, too. It’s especially useful in highly corrosive environments and for blindside work.
Options in Grout: Urethanes versus Epoxies
These two types of products both have a place in concrete repair, but they are not interchangeable. We’ll cover the advantages and disadvantages of each, along with how this knowledge can improve your bottom line.
Green Roofs as a Retrofit
Despite the weight of living roofs, many are finding that existing buildings can be installed much more easily than previously thought. Case studies of both small and large jobs will illustrate solutions for soils, structural support, and waterproofing.
Additional Info
Additional information
| Magazine Format | Digital Download Magazine, Print Mailed Magazine |
|---|